atMETEO - An ATmega based weather station
Besides logging and visualizing internet connection statistics I wanted to track also local weather conditions and later eventually integrate the data into a home automation system. While today there are proprietary and free projects available that facilitate this, the topic seemed to be a perfect candidate for a small spare time open source project, which I called atMETEO.
Project goals and introduction
Programming an ATmega based weather station not only allowed to deepen my knowledge in electronics and microcontrollers, at the same time the project served as practical accompaniment while reading Modern C++ Design and C++ Templates and enabled me to explore the advantages and limits of modern C++ on 8 bit hardware.
The essential concept of atMETEO is to read and interpret data from sensors connected to the microcontroller and to transfer this information to a connected PC for further processing, storing and visualization.
Ideally atMETEO should hereby be able to access my already existing Hideki TS53 RF sensors. Therefore a preliminary step was to reverse engineer their data format.
Conducting test automation is essential in order to develop a stable product which can be left running unattended. For this purpose a Jenkins server has been set up that runs Clang Static Analyzer, builds all commits and executes unit tests (including code coverage generation). In addition it flashes new software periodically and maintains statistics on successful and failed attempts to read sensor data for a given time range to identify possible race conditions.
Technical aspects
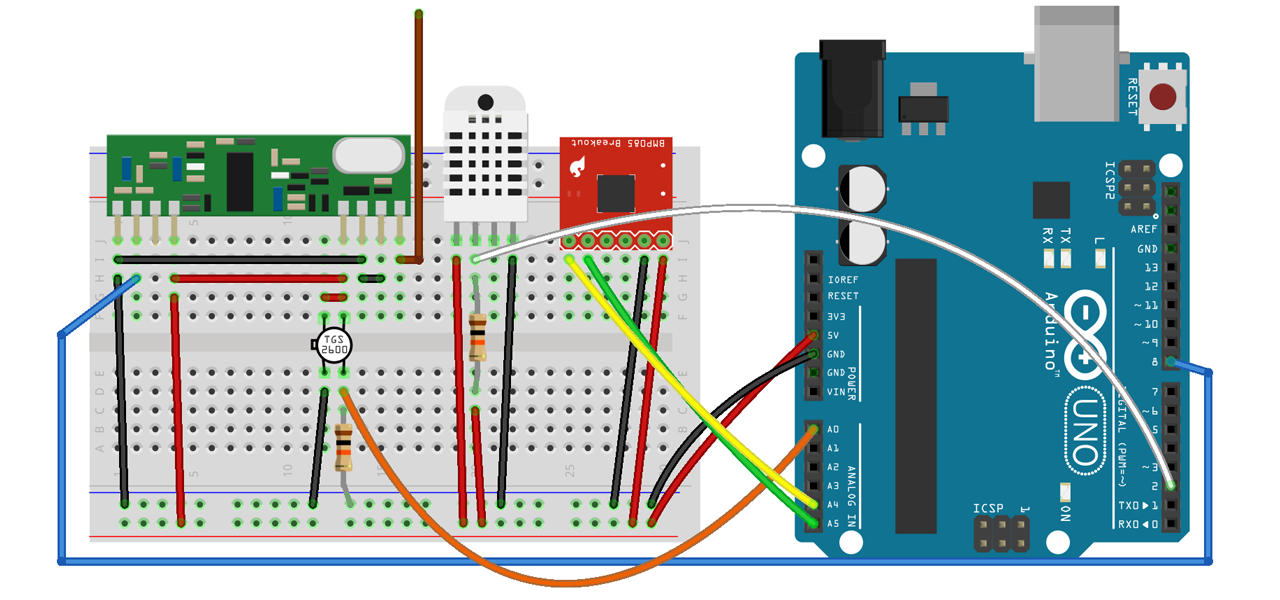
Even though microcontroller projects are usually hardware centric, the main emphasis has been placed on the software part. My current setup utilizes an Arduino Uno, but atMETEO is prepared to be built for different ATmega boards with only minor adaption. Currently there are 5 sensor types supported: Hideki TS53 Thermo/Hygrometer, DHT22 / AM2302 temperature and humidity module, Bosch BMP180 Digital pressure sensor, Melexis MLX90614 Infrared thermometer and Figaro TGS 2600 air contaminant sensor. The RF receiver as well as the other sensors are connected to the microcontroller as shown in the following breadboard circuit (created with Fritzing).
On the software side the project is divided into two main parts. A libsensors library contains the target / platform independent functionality and algorithms and ships with unit tests that can be executed on the host. All utilities for accessing ATmega hardware features (such as pins, timers, UART, I2C (TWI), SPI) as well as an Ethernet driver (WIZnet W5100) are part of libtarget. The main application makes then use of both libraries in order to send the measured sensor data in JSON format over UART or Ethernet (UDP) to the host.
atMETEO uses the CMake build system which controls cross compilation (including flashing) as well as unit tests (including code coverage generation) and Doxygen documentation.
Detailed information can be found in the project’s readme and the documentation.
Graphical user interface
Graphite and grafana are two excellent tools for logging and graphing time series data. With the command line client atMETEO integrates nicely into this setup as it can be configured to transfer measurements to graphite’s carbon daemon.
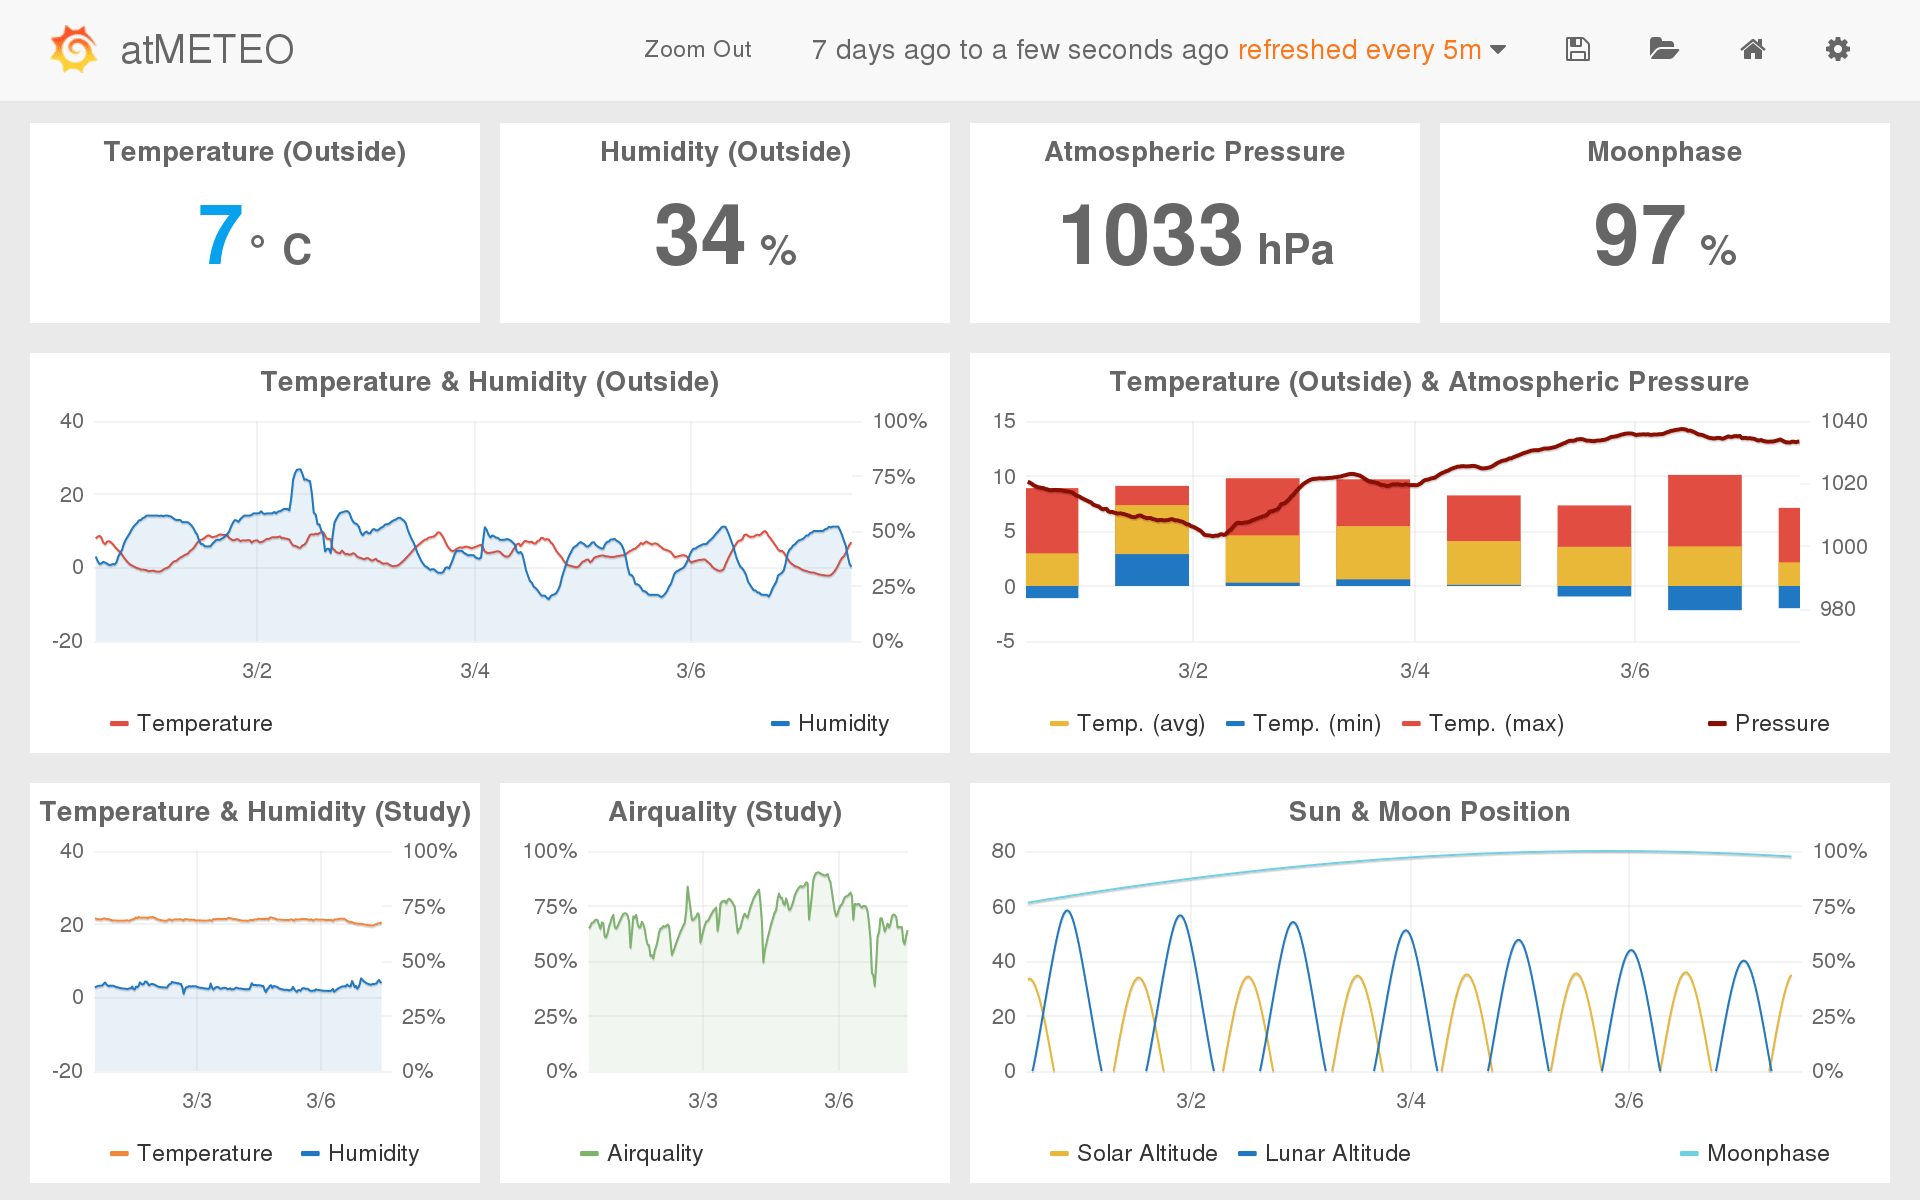
The following screenshot shows the atMETEO dashboard I am using to access the measurements from PC, tablet or phone.
Outlook and further work
atMETEO provides weather data now since more than 10 months, even though hardware and circuit are still just built on a breadboard. One of the very next steps therefore is to solder the sensors on a circuit board and fit everything into a small enclosure.
The measurements are transferred to the host in JSON format. While this is relatively easy to generate on the microcontroller, it requires to run an atMETEO client application on the host to interpret the data and process it. Therefore it would be beneficial to switch to a standard format such as MQTT.

